Welcome to Our Conscious Kitchen
On this corner of MLA, you will find me and sometimes my two littles cooking it up in what we like to call
Keene’s Conscious Kitchen
Browse and enjoy our favorite, easy, delicious, & kid-approved, plant-based recipes.
All recipes found here are meat, dairy, and egg-free!
All Plant Based Recipes

No Knead Bread
No Knead Bread
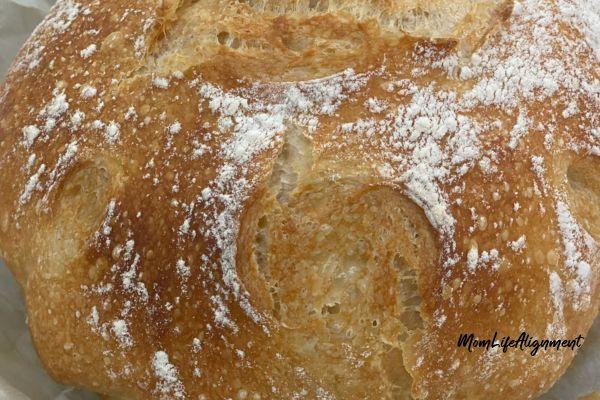
Imagine the delightful aroma of warm, crusty bread filling your home, inviting you to enjoy it with butter, homemade jam, or as part of delicious sandwiches, yummm! With just a little patience for rising, you can create bakery-quality bread right in your kitchen. This simple recipe calls for just a few basic ingredients and requires minimal effort, making it an excellent choice for both beginners and busy homemakers like you and me.
Equipment
Cast iron Dutch oven
Parchment paper or silicone baking mat
Ingredients
3 1/4 cups bread flour (or all-purpose flour) (400g)
1/2 tsp dry active yeast
1 tsp salt
1 and 1/4 cups warm water (300g and about 110°F)
Instructions
1. In a large bowl, whisk together flour, salt, and yeast.
2. Pour in the warm water and stir with the end of a wooden spoon or dough whisk until you form a shaggy dough.
3. FIRST RISE: Cover the bowl with plastic wrap or a clean kitchen towel and let it sit for 12-18 hours or overnight (my preferred method) to double in size.
4. After the first rise, SHAPE THE DOUGH by turning the dough out onto a well-floured surface. With well-floured hands, gently shape the dough into a ball. (Do Not Knead the Dough).
5. SECOND RISE: Place the shaped dough ball on a piece of parchment paper and sit it in a bowl approximately the size of your Dutch oven. Cover the dough and let it rise for another 1 to 2 hours.
6. While the dough is rising, about 30 minutes before baking, place your dutch oven (with lid on) into the oven and PREHEAT THE OVEN to 450°F.
7. Carefully remove the hot Dutch oven. Using the parchment paper or baking mat to lift the dough out of the bowl, carefully place it inside the hot Dutch oven. Cover with the lid and bake for 25 minutes.
8. After 25 minutes, remove the lid and bake for an additional 20 minutes until the bread is golden and browned to your liking.
9. Using the parchment paper or baking mat, carefully transfer the bread to a wire rack and let it cool for at least 30-45 minutes before slicing.
Experiment with the following:
-Try using different flours, such as bread flour and mixtures of whole wheat and all-purpose flour for varied tastes and textures.
-Try adding fresh herbs, olives, or seeds into your dough mixture before the first rise to create a customized loaf.
NOTES
Silicone baking mats are a great tool to help you easily lift and quickly transfer your dough from bowl to oven.
Use a kitchen scale for the best results to weigh out your flour and water for accuracy.
Make sure the water is warm to activate the years, but not too hot that it kills the yeast.
Letting the dough rise longer, up to 18 hours or overnight, helps to enhance the flavor profile and texture of your bread.
Allow the bread to cool completely on a wire rack for the best texture before slicing.
Store leftover bread in an airtight container at room temperature for up to two days.
DISCLAIMER
This website is a participant in the Amazon Services LLC Associates Program, an affiliate advertising program designed to provide a means for sites to earn advertising fees by advertising and linking to amazon.com


