Welcome to the Blog
The blog Mom Life Alignment is here to assist mamas in cultivating a healthy home and family life by offering guidance, resources and support focused on intention, joy and conscious alignment.

Quick & Easy Home Canned Pickles
Quick & Easy Home Canned Pickles with Mrs Wages
My kids love cucumbers, and we eat a lot of pickles in this house. This year, we had an abundance of cucumbers from Grandaddy's garden, so we had to get busy and can up as many pickles as possible before the season ended. There are many ways to make home-canned pickles, and one of the easiest I've found so far was to use Mrs. Wages Pickling Mix.
After harvesting the cucumbers, we washed them thoroughly, which went by so much faster with my handsome helper.

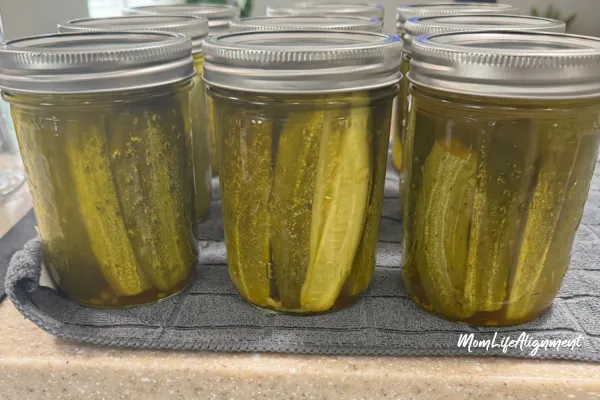
Next, we cut and sliced the cucumbers to fit the jars. In this batch, I made spears and halves. For our second batch, we made crinkled pickle chips and slices.

We filled the jars with cucumbers making sure they all fit the size of our jars to allow for appropriate headspace when filling with brine and the canning process. The next step is to prepare the brine according to the package directions and then to fill the jars with the hot brine.

Equipment
Canning Jars
Canning Lids and Rings
Water Bath or Steam Canner
Jar Lifter or Canning Tool Set
Ingredients
9-11 lbs Fresh Cucumbers
3 1/3 cups Distilled Vinegar (5% acidity)
7 1/3 cups Water
1 Pouch Mrs. Wages Dill Pickle Mix
Instructions
Prepare and process jars and canning lids according to the manufacturer's instructions.
Wash cucumbers, cut off blossom ends, and leave pickles whole, cut into halves, spears or slice.
Combine vinegar, water, and Mrs. Wages in a large non-reactive pot. Bring mixture just to a boil and stir occasionally to ensure the mixture has dissolved.
Pack cucumbers into hot jars, leaving 1/2 inch headspace. Evenly divide pickling liquid among packed jars. Remove air bubbles, wipe rims, and cap each jar with a lid. Place the canning rings on finger-tight.
Canning Process
Process pints for 10 minutes and quarts for 15 minutes in a boiling water bath or steam canner.
Turn off the heat, carefully remove the canner lid, and allow jars to sit for 5 minutes.
With a jar lifter carefully remove jars and allow them to sit undisturbed to cool at room temperature for 12-24 hours. After the cooling period, test jars for airtight seals.
Serve chilled, and enjoy!
NOTES:
If more liquid is needed for proper headspace, add a mix of 1 part hot vinegar to 2 parts hot water.
After 12-24 hours of cooling at room temperature, test jars for airtight seals. If jars do not seal completely, store them in the fridge and consume them within 1 week.
Unused brine can be stored in the fridge for up to 1 week.
Before serving, chill pickles for enhanced flavor and crispness.
Pickles can be stored on the shelf for up to 18 months when canned properly.
Steam canning has become my favorite way to preserve the harvest. Know and understand that pressure canning and water bath or steam canning are not the same process. Only high-acid foods can be processed using a water bath or steam canner. However, using a steam canner is the same process and time used for water bath canning, except that with steam canning, you use much less water in the steam canner.
DISCLAIMER
This website is a participant in the Amazon Services LLC Associates Program, an affiliate advertising program designed to provide a means for sites to earn advertising fees by advertising and linking to amazon.com


